How to install WordPress 5.x in Windows Xampp Server
In this article, we are going to discuss installation of WordPress 5.x in xampp server.
WordPress is an open source content management system which based on PHP and MySQL. You can work with it both online or offline. However, managing WordPress offline requires you to install a compatible web server and the package as well. Below are instructions to install WordPress on XAMPP .
Installing WordPress 5.x on local host
Installing WordPress! 5.x on local host is straightforward but can be tricky the first time you attempt it. So for this step we’ve provided instructions on how to do it right from scratch.
First, let’s make clarify the meaning of “Localhost”. A localhost is basically the same type of web server like Hostinger, Siteground etc but installed on your own computer.
Now, in order to run WordPress!, you need not only a web server, but also 2 more things: PHP script interpreter and MySQL database system. It sounds complicated but thankfully, there is a single package called XAMPP with all the elements included.
Let’s install XAMPP on your computer:
- Download the XAMPP installer package at https://www.apachefriends.org/index.html
- Run the installation file as you do with regular software and follow the step by step instructions.
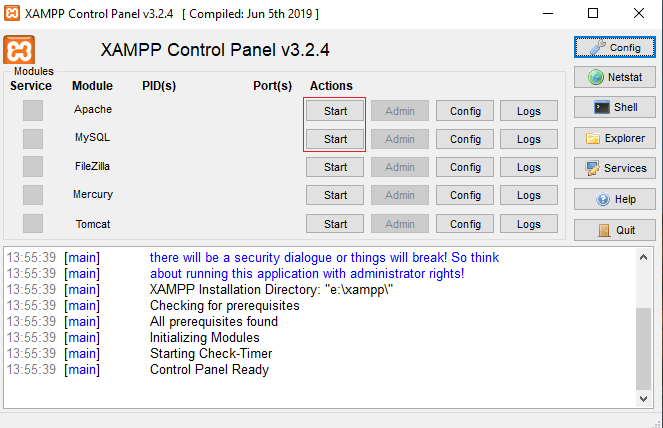
- Open “XAMPP Control Panel Application” and start “Apache” and “MySQL”.
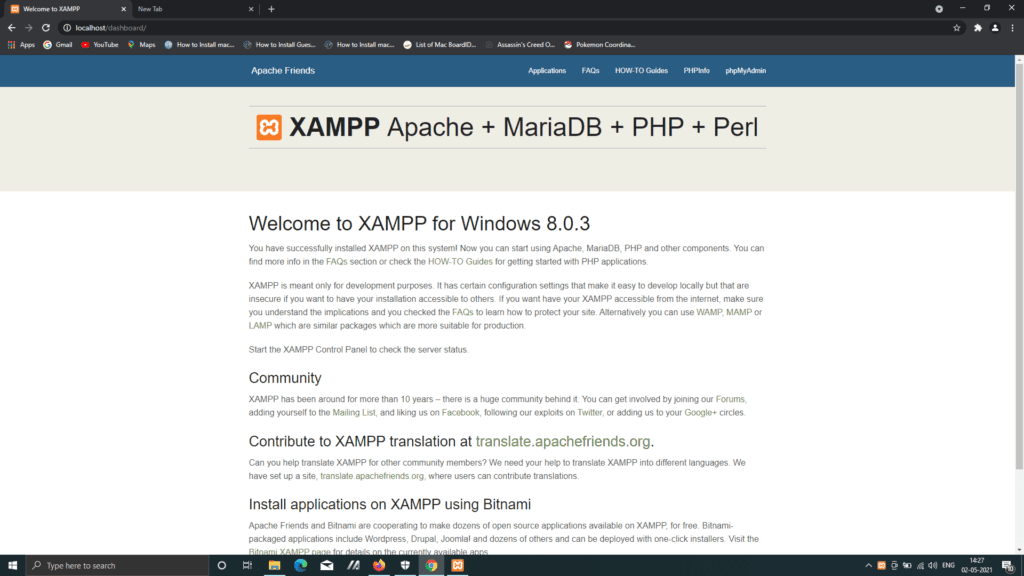
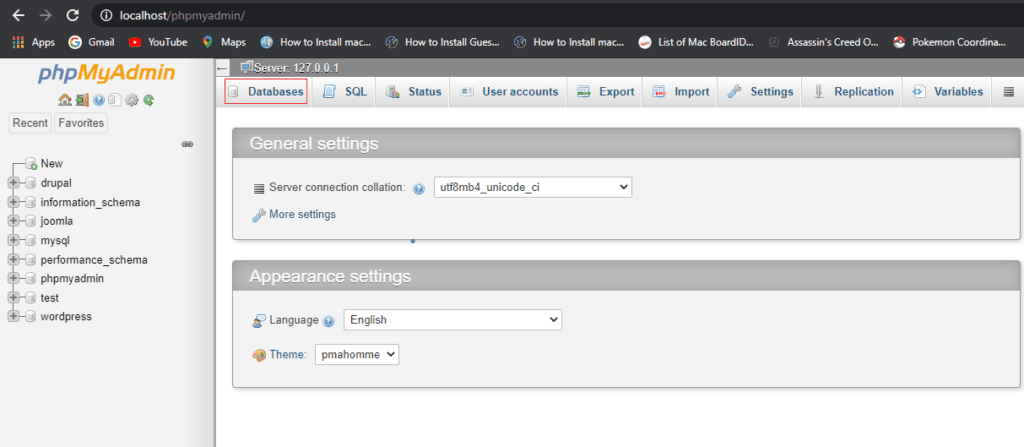
That’s it, your localhost is now installed. You can check if it works or not by typing the address:
“http://localhost” in your web browser. You should see a page as illustrated below.
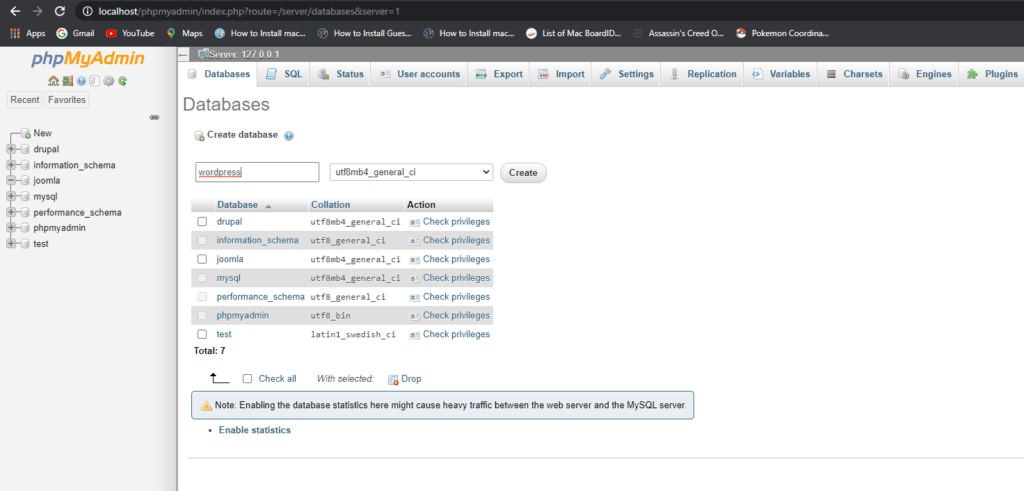
- Create a database in phpMyAdmin.
Type http://localhost/phpmyadmin on your address bar. It’ll lead you to the phpMyAdmin Home Page.
5. Next, click Database in the toolbar as illustrated in the following
6. Next, enter the database name, In my case it is wordpress and then click “Create”
Requirement check before installation:
- PHP Version 7.3 or greater is needed for WordPress 5.7.1 to run.
- download install latest xampp server from this link. https://www.apachefriends.org/index.html
Note: If your existing xampp is in older PHP version(<7.3) , take a back up of data folder in path C:\xampp\mysql\, also rename C:\xampp folder to some other name, then install new xampp with higher PHP version. place old data folder content in the newly created C:\xampp\mysql\data folder. so you can see all databases in your new xampp mysql.
Increase max_execution_time value into higher values in php.ini.
You can edit php.ini file from xampp control panel by click on config button as shown below.
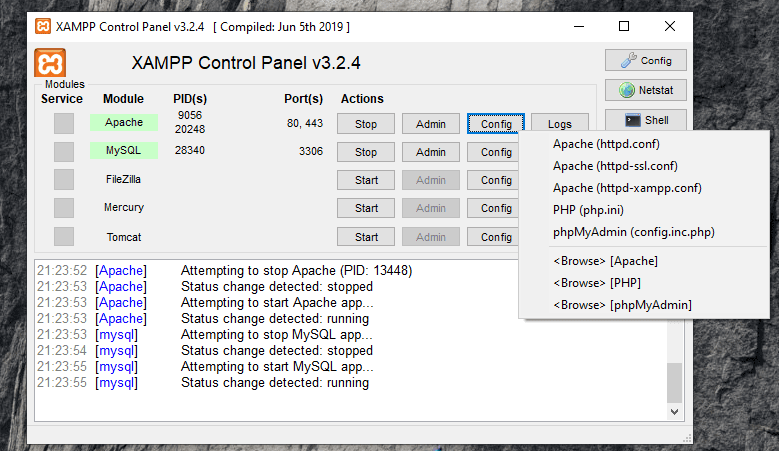
Then restart apache using xampp control panel. If you are not updating execution time , there is a chance to stop your installation process in the middle.
Note: Remember user name and password of your localhost. For Xampp Server, default username is “root” and has no password.
Installing WordPress!
- Download the WordPress! 5.x full package at https://wordpress.org/
- Create a new folder entitled “wordpress” in folder “htdocs” in XAMPP folder. Normally it will be located at “C:\xampp\htdocs”
- Unpack the downloaded package file. Now, Copy and Paste the all files and Folders of Unpacked Package into the folder “wordpress” which we had created in Previous step.
- Go to the URL “http://localhost/wordpress”
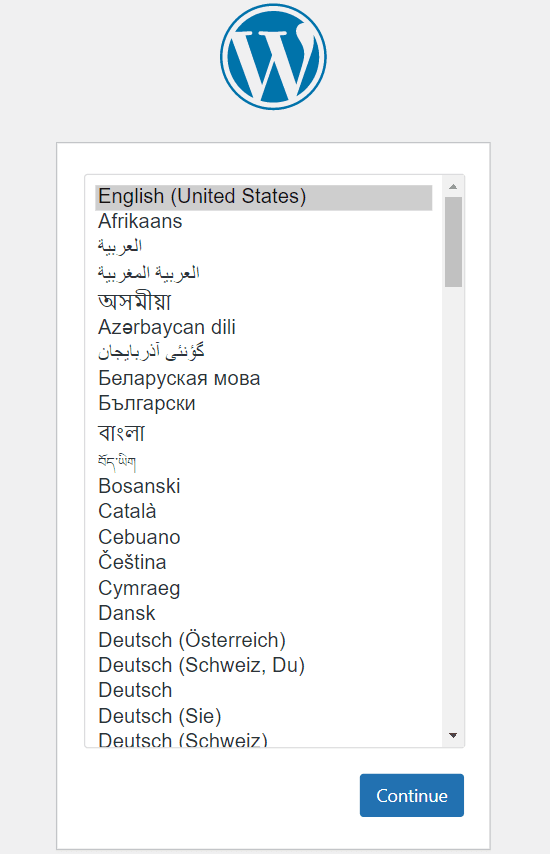
- Follow all steps in wordpress! installation:
Choose a language
- Select Language: Choose your own language in the drop-down menu, for example, “English (United States)”
- Click “Continue“
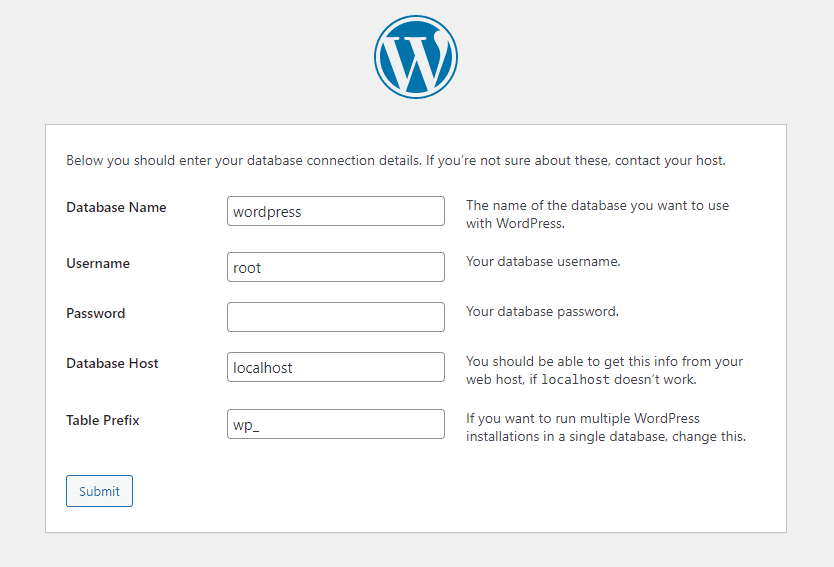
Provide your database details
- Database Name: enter the name of the database you created “wordpress”
- Username: Enter “root”
- Password: let it blank
- Database Host: Enter “localhost”
- Table Prefix: let it generate automatically
- Click “Submit“
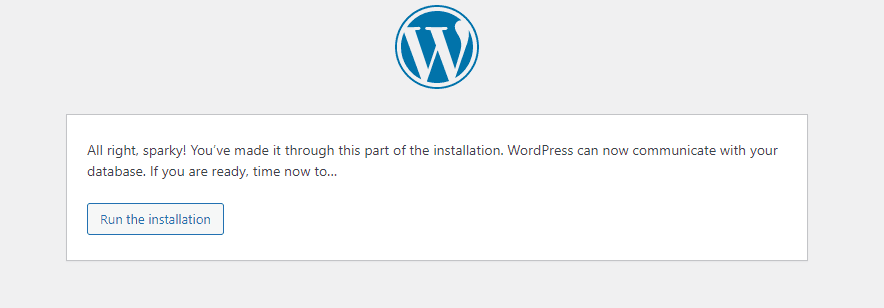
Run the Installation
- Click the “Run the installation” button to begin the WordPress installation process.
Information needed
- Site Title: Enter the name of your site
- Username: Enter “admin” as default
- Password: Enter your own password
- Your Email: Enter your valid email address you want to use for your site
- Search Engine Visibility: Tick the box, If You discourage search engines from indexing this site.
- Click “Install WordPress“

Installation Complete
Now you have your first WordPress! site installed successfully! It’s not too hard, right?
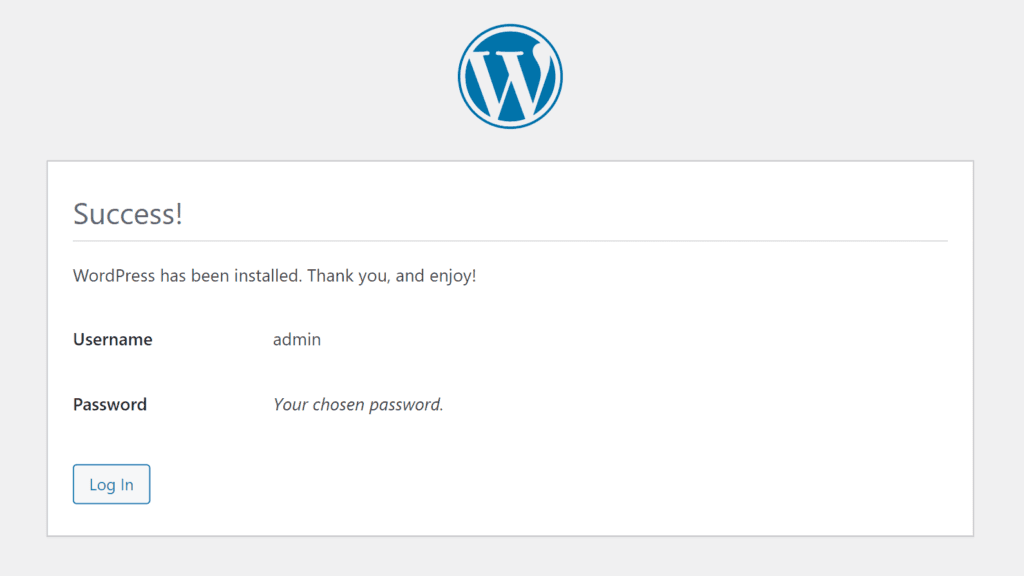
Log In to Your WordPress Localhost Website
- Type localhost/wordpress/wp-admin on your address bar. It’ll lead you to the login page.
- Input the previously Entered username and password to log into your windows WordPress localhost website.

Conclusion:
This article covers the simple way of installing the WordPress in Your Local host. You can also use this process for installing Drupal and Joomla in your Localhost.
If you have any query regarding to this article you can ask through comment section.